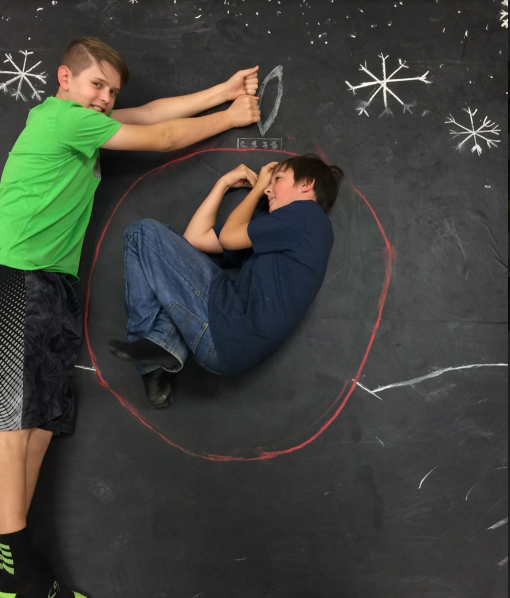
CHALLENGE 6: Kristen Elliott.
2D or Not 2D? Winter Photo Project
Attached is a copy of the Google Doc that each student will have access to (and will be able to edit to write their descriptions) through Google Classroom. They will also use Google Search for research, source photos, and to generate ideas. TEKS: 7.1AB, 7.2ABC, 7.3ABC, 7.4AB, 8.1AB, 8.2ABC, 8.3ABC, 8.4AB
Day 1:
We will first discuss the muralist Julian Beever and see examples of his work. (Click this link for youtube video Julian Beever- Muralist)
Students will then discuss the historical significance and cultural importance of muralists in the 21st century. Students will Google “chalk muralist” to find other current artist’s work.
Day 2:
Students will break into groups and complete steps 1-3 of the assignment
Day 3:
Groups 1 & 2 complete steps 4-6 of the assignment (the remainder of the class does holiday craft)
Day 4:
Groups 3 & 4 complete steps 4-6 of the assignment (the remainder of the class does holiday craft)2D or Not 2D? Winter Photo Project
For this assignment we will be creating interactive murals with chalkboard contact paper, chalk, and YOU! The size of your mural will be 6.5’ x7.5’ and will be drawn on the contact paper attached to the floor. Each person in your group will then be photographed “inside” the drawing interacting with your surroundings. Ours will be a winter wonderland or holiday theme so get to googling image ideas to fit our theme! There will be two photographs due for this project to be turned in through google classroom.
- A photo of sketches of your group’s ideas (load each attachment separately)
- A photo (cropped and edited) of each member of your group “inside” the drawing, interacting with your surroundings.
Assignment…Step by Step:
Step 1: Discuss with your group members (listed below) what objects and background you would like in your drawing. Each member should google ideas and source photos for your drawing that are winter or holiday related.
Step 2: Beside your group’s names below, write a brief description of your mural. No two groups should be the same, so read over the other student’s ideas.
Step 3: As a group, sketch out your ideas on a sheet of white paper…use the colors you plan on using for the final mural. Photograph your sketches.
Step 4: Your group will only have 15 minutes to draw the mural and 5 minutes to photograph each other in the mural… you must work quickly and as a team to complete the work on time!
Step 5: Edit your photo… crop and resize if necessary. Submit at least two photos on each group member’s Google Classroom… A photo of your original sketches and an edited photo of yourself “inside” the mural.
Step 6: Submit your final photo with an audio or text description in Seesaw. Extra bonus points if you submit an additional short video in Seesaw of your group working on the sketches, mural or taking the photographs!
Have fun and let’s make some amazing art!


